To test a bug zapper, inspect it while unplugged, check its power source, examine the UV lamp, and observe its normal operation from a safe distance. Never touch the electric grid or insert a tool to create a spark.
During a warm summer evening in the United States, a bug zapper can help reduce flying insects around a patio, porch, garage, or backyard. But what happens when its light turns on and you no longer hear the familiar zapping sound? Before buying another unit, check whether the power supply, lamp, or electric grid has a problem. A few simple checks can help you narrow down the cause.
Learning how to test a bug zapper does not mean opening its electrical parts or touching its high-voltage grid. These devices can retain an electrical charge even after you unplug them. A safer test starts with a visual inspection and a working outlet. You can then check the lamp, switches, wiring, and normal operation without putting your hands or tools near live parts.
This guide explains how to test plug-in, outdoor, rechargeable, and solar-powered bug zappers. It also covers common warning signs, safe cleaning, bulb checks, and problems that may look like electrical failure but actually come from poor placement. The goal is to help you identify a likely problem and know when to stop and contact the manufacturer.
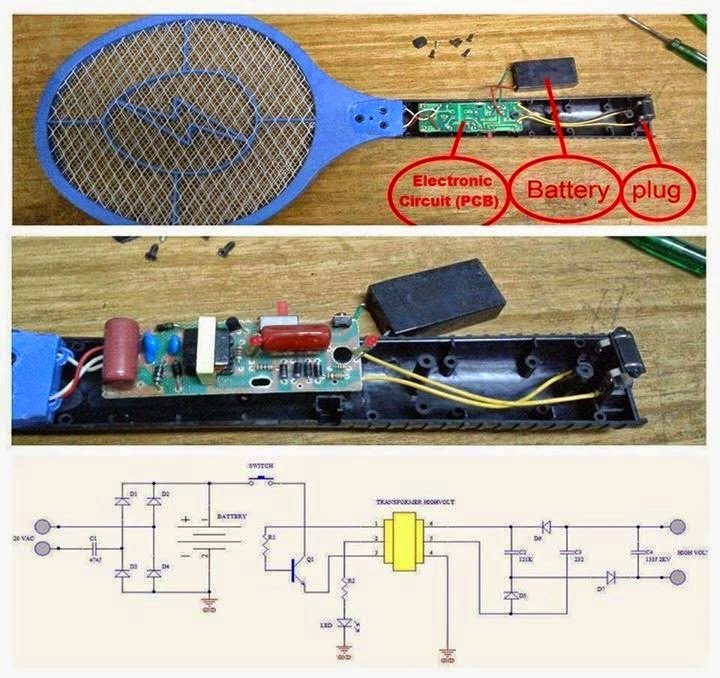
Source: raypcb.com
Why Should You Test a Bug Zapper?
Testing a bug zapper helps you find out whether the device is receiving power and whether its main parts appear to work. It can also help you separate an electrical problem from a pest-control problem. For example, a lamp may glow normally even when the electric grid has stopped working.
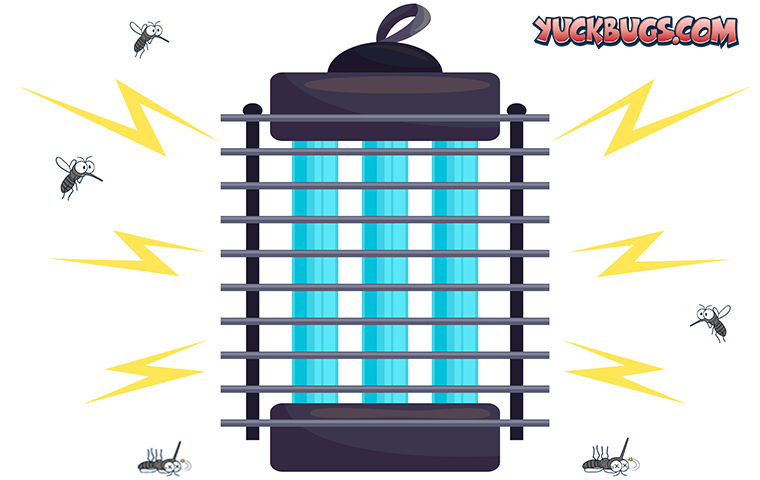
Most plug-in electric bug zappers use an ultraviolet or UV-A lamp to attract certain flying insects. An internal high-voltage circuit then sends electricity through a metal grid. When a suitable insect touches the energized grid, an electrical discharge kills it.
These two functions matter when you test the device. The light helps attract insects, while the grid performs the actual zapping. A problem with either part can reduce performance, but each needs a different troubleshooting approach.
A test is also useful before the insect season begins. If you live in a state with warm summers, such as Florida, Texas, Georgia, or Louisiana, checking outdoor pest-control equipment before heavy insect activity can help you avoid discovering a fault on a busy evening.
Source: files.aptuitivcdn.com
Check electrical operation
Find out whether the device receives power, responds to its switch, and shows normal signs of operation.
Check the attraction lamp
Look for a working lamp and signs of damage, poor connections, or aging.
Identify grid problems
Look for excessive insect debris, visible damage, or a lack of normal zapping activity without touching the grid.
Avoid unnecessary replacement
A faulty outlet, loose bulb, or dirty grid may explain the problem. Identifying the cause can prevent an unnecessary purchase.
What Does a Normal Bug Zapper Do?
A typical electric bug zapper has a power connection, a lamp or UV light source, an internal high-voltage circuit, a protective outer housing, and an electrified inner grid. Some models also include a removable insect tray and a cleaning brush.
When the device is switched on, its lamp produces light that attracts certain insects. The high-voltage grid remains behind a protective barrier. Insects that reach the inner grid may produce a short popping or snapping sound as they make contact.
Not every insect will be attracted to the same light. Some species respond more strongly to other cues, such as carbon dioxide, body heat, moisture, or food. Therefore, a zapper can operate normally without catching every mosquito or fly in the area.
UV lamp
Provides a light signal that attracts some flying insects. Visible brightness alone does not prove that the lamp produces the right attraction wavelengths.
High-voltage grid
Creates the electrical discharge that kills insects that contact the energized wires.
Power supply
Provides electricity to the lamp and internal electrical circuit.
Protective housing
Keeps people and pets away from the internal electrical parts during normal use.
What You Need Before Testing a Bug Zapper
You do not need electrical repair equipment to perform the basic checks in this guide. A careful visual inspection and a safe outlet check are enough to identify several common problems.
Start by finding the owner’s manual. Different brands use different lamps, power systems, safety covers, and maintenance methods. A replacement bulb that fits one model may not work in another.
Keep children and pets away from the testing area. If the unit is installed outdoors, choose a dry area and avoid handling wet plugs, cords, or electrical connections.
Do not open the electrical compartment or remove protective barriers just to see whether the device works. If a test requires access to high-voltage parts, leave that work to a qualified repair technician.
Source: ourpcb.com
Owner’s manual
Use the instructions for your exact model to identify approved inspection, cleaning, and bulb-replacement procedures.
Working household device
A lamp or another suitable appliance can help you check whether a wall outlet supplies power.
Dry cloth
Use it only on exterior surfaces after the zapper has been disconnected and cooled.
Manufacturer-approved cleaning brush
Use the supplied brush if the manual permits cleaning the grid. Do not substitute metal tools or wet cleaning methods.
Replacement lamp, if needed
Check the exact model number, lamp type, voltage, wattage, and fitting before purchasing a replacement.
Understand the Electrical Safety Risk First
An electric bug zapper can produce a high voltage inside its housing. The voltage at the grid can be much higher than the voltage supplied by a household outlet. The internal circuit may also include components that store electrical energy after the plug has been removed.
For this reason, switching the unit off is not the same as proving that every internal part is safe to touch. Follow the manufacturer’s waiting and servicing instructions. If the manual does not explain how to make the electrical parts safe, do not attempt an internal inspection.
Avoid online spark-test instructions that tell you to place a screwdriver or scissors across the grid. Such a test deliberately creates an electrical discharge and exposes you to a shock, burns, damaged equipment, or other hazards. It is not necessary for basic homeowner troubleshooting.
Never touch the inner grid
Do not use your fingers, a screwdriver, scissors, wire, or another object to test whether the grid is energized.
Disconnect power before maintenance
Unplug the device before cleaning, checking accessible bulb fittings, or removing a collection tray.
Do not assume the charge is gone
Internal components may retain energy. Follow the exact manufacturer’s discharge and waiting instructions.
Avoid wet cleaning
Never spray water into the unit or immerse it in liquid. Moisture can create an electrical hazard.
How to Test a Bug Zapper Step by Step
The safest way to test a bug zapper is to begin with checks that do not expose you to its electrical parts. Work from the outside toward normal operation, and stop if you find a damaged cord, cracked housing, exposed wire, or another serious defect.
The following steps apply mainly to standard plug-in electric bug zappers. Rechargeable and solar models need a few extra checks, which are covered later in this guide.
Source: i.ytimg.com
Step 1: Turn off and unplug the unit
Switch off the bug zapper and disconnect it from the wall outlet. Do not begin cleaning or removing accessible covers while the device is connected to power.
Step 2: Inspect the exterior
Look for a damaged power cord, loose plug, cracked housing, missing protective screen, broken switch, or signs of moisture. Do not use a damaged unit.
Step 3: Check the electric grid visually
Look through the protective housing for broken wires, heavy insect buildup, visible deformation, or objects stuck between the grid wires. Do not insert anything into the housing.
Step 4: Check the collection tray
If the model has a removable tray, follow the manual to remove it after disconnecting power. Look for accumulated insects or debris and clean it as directed.
Step 5: Check the lamp
Look at the lamp through the normal protective opening. If the manufacturer allows user replacement, check its seating only after disconnecting power and following the specified waiting procedure.
Step 6: Test the power outlet
Use a known-working household device to check the same outlet. If that device also fails, investigate the outlet, breaker, or GFCI rather than opening the bug zapper.
Step 7: Reassemble the unit
Make sure the tray, access panel, protective covers, and screws are correctly fitted. Never operate a unit with a missing safety barrier.
Step 8: Observe normal operation
Reconnect the fully assembled unit to a suitable, dry power source. Stand back and observe whether its lamp and normal operating indicators work. Never approach or touch the inner grid.
Step 1: Turn Off and Unplug the Bug Zapper
Start by turning the power switch to OFF. Remove the plug from the outlet by holding the plug itself rather than pulling on the cord.
If the zapper is connected to an extension cord, disconnect it from the power source as directed by the manual. Do not assume that turning off a switch or a power strip makes the internal grid safe.
Follow the model’s specified waiting period before performing any approved maintenance. Some manufacturers provide a discharge procedure, while others require service by an authorized technician.
Good sign
The unit is switched off and completely disconnected from its power source.
Warning sign
The plug, socket, or cord is hot, melted, discolored, or damaged. Stop using the device.
Step 2: Inspect the Housing and Power Cord
Examine the outside of the bug zapper carefully. Check the plug blades, cord insulation, housing, hanging points, and accessible switch. Look for cuts, exposed conductors, burn marks, loose parts, or signs of water entering the enclosure.
A damaged cord is not a minor issue. Even if the lamp still lights, damaged insulation can expose you to electric shock or create a fire risk. Do not wrap damaged wiring with ordinary tape and continue using the device.
Also check that the outer protective screen remains in place. It should prevent accidental access to the energized grid. If the screen is bent or missing, do not operate the zapper until it has been properly repaired or replaced.
Normal condition
The housing is intact, the cord has no visible damage, and all safety covers are securely fitted.
Unsafe condition
Exposed wires, cracks, burn marks, missing covers, or a loose power connection require the unit to remain unplugged.
Step 3: Inspect the Electric Grid
Look at the inner grid through the protective screen. You may see dead insects, dust, or other debris collected between the wires. Heavy buildup can interfere with normal operation and may contribute to electrical problems.
Check for visibly broken wires, bent sections, or material that appears to bridge the grid. Do not try to move the wires or remove trapped material with your fingers. Even after unplugging, the grid may retain an electrical charge.
If the manual permits homeowner cleaning, use only the supplied brush and follow the stated safety procedure. If the grid is badly bent, broken, or damaged, contact the manufacturer instead of trying to reshape it.
Light debris
May be removable using the manufacturer’s approved dry-cleaning method.
Heavy insect buildup
Can block parts of the grid and should be cleaned according to the manual.
Broken or distorted wires
May create a short circuit or unsafe operating condition. Stop using the device.
Step 4: Check the Collection Tray
Many electric bug zappers have a tray that catches dead insects. A full tray can make maintenance harder and allow debris to accumulate inside the device.
Remove the tray only after disconnecting power and following the manufacturer’s instructions. Empty it into a trash bag and use a dry cloth if the manual permits cleaning the tray.
Make sure the tray locks back into place. A loose tray or incorrectly installed access panel can expose internal parts or prevent the unit from operating as intended.
Successful check
The tray is clean, dry, and securely attached.
Problem found
The tray is cracked, cannot lock into position, or contains signs of melted plastic or water damage.
Step 5: Check the UV Lamp
The UV lamp is an important part of an electric bug zapper. It attracts certain flying insects toward the inner grid. If the lamp fails, the device may receive power but attract fewer insects.
Observe the lamp during normal operation from a safe distance. If it does not illuminate, the cause may be a failed lamp, a loose lamp connection, a damaged starter, or another electrical problem. The exact cause depends on the model.
A glowing lamp does not prove that its UV output is still strong enough for effective insect attraction. Some lamps become less effective with age even when they continue to produce visible light. Check the replacement schedule in the owner’s manual.
Lamp illuminates normally
The lamp is receiving power, but this does not confirm that the high-voltage grid works.
Lamp does not illuminate
Check the outlet and switch first. If the power supply works, follow the manual’s approved bulb inspection procedure.
Lamp looks dim or aged
Compare its condition and operating hours with the manufacturer’s replacement guidance.
Lamp flickers repeatedly
A poor connection or failing lamp may be involved. Stop using the device if you notice unusual electrical sounds, heat, or burning smells.
Step 6: Test the Electrical Outlet
A faulty outlet can make a perfectly good bug zapper appear broken. To check the outlet, use a known-working household device that is suitable for that outlet and does not have a damaged plug or cord.
If the second device also fails, check the relevant circuit breaker or GFCI reset button when it is safe to do so. A GFCI is a ground-fault circuit interrupter. It helps cut power when it detects certain electrical leakage conditions.
Outdoor bug zappers should be connected to a GFCI-protected circuit when the manufacturer’s instructions require it. Outdoor electrical connections must also remain dry and protected from damage.
If a GFCI repeatedly trips, do not keep resetting it to force the zapper to work. The problem may involve moisture, damaged wiring, or an internal electrical fault. Have the electrical supply checked by a qualified professional.
Outlet works
The other device operates normally, so you can continue checking the bug zapper itself.
Outlet does not work
The circuit, outlet, breaker, or GFCI may need attention.
GFCI trips repeatedly
Disconnect the bug zapper and stop using it until the cause has been identified.
Step 7: Reassemble and Observe Normal Operation
Before reconnecting the unit, make sure every removable part is correctly installed. The tray, access door, screws, and protective screen should all be secure.
Place the zapper in its approved operating location. Make sure the cord is not stretched, pinched, or lying in standing water. Keep children and pets away from the appliance.
Reconnect the unit and turn it on using its normal switch. Observe the lamp and any normal operating indicators from a safe distance. Do not touch the housing openings or attempt to create a spark.
A normal lamp and the usual operating sounds are encouraging signs. However, they do not prove that the high-voltage grid is functioning correctly. If the grid appears inactive or the device behaves abnormally, turn it off and contact the manufacturer.
Encouraging result
The lamp operates normally, the housing remains intact, and the device shows no unusual heat, smell, or electrical noise.
Uncertain result
The lamp works, but insects are not being zapped. The grid or attraction system may need further inspection.
Failed result
The unit does not turn on, trips a protective device, produces a burning smell, or shows visible electrical damage. Disconnect it and seek service.
How to Tell If the Electric Grid Is Working
The electric grid is working when it can produce the intended electrical discharge during normal operation. However, homeowners should not try to prove this by touching the grid, placing a tool across it, or measuring its high voltage.
A better approach is to combine safe observations with the manufacturer’s troubleshooting guidance. Check whether the lamp works, whether the grid is visibly clean and undamaged, and whether the device produces normal zapping activity when insects naturally contact the grid.
A faint snapping sound may occur when an insect reaches an energized grid. The sound can vary with the insect, device design, and surrounding noise. The absence of a sound during a short observation does not automatically mean that the grid has failed.
If insects visibly reach the grid but the unit produces no normal zapping activity, the high-voltage circuit may need inspection. A failed transformer, damaged circuit, contamination, or an internal connection problem can cause this symptom.
Source: 1.bp.blogspot.com
Observe normal operation
Listen from a safe distance for the usual short discharge sounds when insects naturally reach the grid.
Look for visible contamination
Heavy insect debris may interfere with operation and should be cleaned only through the approved maintenance procedure.
Check for visible damage
Broken or bent wires are a reason to stop using the unit.
Contact the manufacturer
If the lamp operates but the grid appears inactive, request model-specific troubleshooting or authorized service.
Why You Should Avoid the Screwdriver Spark Test
Some online instructions recommend using an insulated screwdriver to touch two parts of the electric grid and look for a spark. This is not a suitable homeowner test. It deliberately creates a short electrical discharge and brings a person close to a high-voltage component.
An insulated handle does not make every screwdriver safe for this purpose. The tool may have damaged insulation, and the user may still contact an energized part. A stored charge may also remain after the device has been unplugged.
Creating a spark can damage the grid or electrical circuit. It can also cause a shock, burns, or an unexpected reaction. The safer choice is to use the manufacturer’s approved diagnostic procedure or have a qualified technician inspect the device.
Do not bridge the grid
Never place a screwdriver, scissors, wire, or other object across the metal grid.
Do not use a homemade tester
Avoid improvised electrical tests on the zapper’s high-voltage output.
Use authorized service
Internal high-voltage testing should be handled by someone qualified to work on that equipment.
Can a Multimeter Test a Bug Zapper?
A standard household multimeter is not a suitable tool for testing the high-voltage grid unless the exact meter, probe, and test method are specifically rated and approved for that measurement. A typical meter may not tolerate the voltage or electrical conditions inside the zapper.
Using the wrong meter setting or touching the wrong connection can damage the meter and expose the user to electrical shock. The grid also operates differently from a normal household power outlet.
You can use ordinary electrical testing equipment for other approved tasks only when you know the equipment’s ratings and follow its instructions. Leave high-voltage grid measurements to a qualified service technician with suitable equipment.
Safe homeowner check
Check the outlet with a suitable, known-working household appliance.
Professional check
Have an authorized technician inspect internal voltage, the transformer, and the high-voltage circuit.
How to Test a Bug Zapper That Does Not Turn On
If your bug zapper does not turn on, start with the power supply rather than opening the housing. A dead outlet, switched-off GFCI, damaged extension cord, or loose plug can prevent the unit from operating.
First, check the outlet with another suitable device. Next, inspect the cord and plug while the zapper is disconnected. If the outlet works and the cord looks intact, check the power switch and any accessible reset feature described in the manual.
Do not open the electrical compartment to check a fuse or internal connection unless the manufacturer specifically identifies that task as user maintenance. Some models have replaceable external parts, while others require authorized service.
Source: raypcb.com
No light and no operating sound
Possible causes include a dead outlet, tripped GFCI, damaged cord, faulty switch, or internal power failure.
Light flashes but does not remain on
The lamp, starter, socket, or internal power circuit may have a fault.
The outlet works but the zapper remains dead
The problem may be inside the appliance and could require authorized service.
Check the Outlet and Breaker
An outlet can stop supplying power because of a tripped breaker or GFCI. Check the electrical panel for a tripped circuit breaker and inspect the relevant GFCI outlet for a reset condition.
If a breaker or GFCI trips again after you restore power, stop. Repeated trips may indicate a fault that needs professional attention. Do not bypass the protective device or use an unprotected outlet to keep the bug zapper running.
One-time trip
Follow the outlet and breaker instructions, then check whether the circuit works normally.
Repeated trips
Disconnect the appliance and arrange a qualified electrical inspection.
Inspect the Extension Cord
If you use an extension cord outdoors, make sure it is rated for outdoor use and meets the electrical rating of the zapper. In the United States, outdoor extension cords often carry a W-A marking and a label stating that they are suitable for outdoor appliances.
Look for cuts, crushed sections, loose connectors, and signs of water damage. Replace a damaged cord rather than trying to repair it with tape.
Keep outdoor electrical connections dry and off the ground. Do not connect several extension cords together unless the manufacturer specifically permits the arrangement.
Correct cord
Matches the appliance rating and is approved for the intended outdoor use.
Incorrect cord
Is damaged, too lightly rated, or not designed for outdoor conditions.
How to Test a Bug Zapper That Lights Up but Does Not Kill Insects
When a bug zapper lights up but does not kill insects, the lamp and the electric grid need to be considered separately. A working lamp does not confirm that the high-voltage circuit is producing the correct output.
Start by checking the grid for visible insect buildup and damage while the device is unplugged. If the manual permits cleaning, use its approved procedure. Then check whether the lamp has reached its recommended replacement interval.
If the unit still appears inactive after these checks, the high-voltage circuit may be damaged. The transformer, internal wiring, or other electrical components may require service. Do not try to repair these parts yourself.
There is another possibility: the zapper may work, but the insects in your area may not be attracted to it. A light trap cannot attract every insect equally well. Its performance depends on the target species and the conditions around the unit.
Source: i.ytimg.com
Dirty grid
Accumulated insects and dust can interfere with normal operation. Clean only as instructed.
Aging UV lamp
The lamp may still glow while producing less effective insect-attracting light.
High-voltage circuit failure
A damaged transformer or internal circuit can prevent the grid from operating.
Poor placement
Competing outdoor lights and an unsuitable location can reduce the number of insects that reach the device.
Check Whether the UV Lamp Needs Replacement
A UV lamp can lose some of its useful output over time. This is why a bug zapper may appear to work even when its attraction performance has declined.
Check the lamp life listed in the owner’s manual. For example, the DynaZap DZ30200 and DZ30300 manual lists an approximate lamp life of 3,000 hours and advises regular replacement to maintain UV effectiveness. That figure applies to those models, not every bug zapper.
Do not choose a replacement lamp based only on its physical size. Match the exact lamp type, voltage, wattage, fitting, and model compatibility. Disconnect the unit and follow the manufacturer’s replacement steps.
Check operating hours
Compare the lamp’s estimated use with the replacement schedule in the manual.
Check the lamp label
Confirm the model and electrical specifications before ordering a replacement.
Avoid incompatible lamps
A lamp that physically fits may still have the wrong electrical or UV characteristics.
Check the High-Voltage Circuit Through Safe Symptoms
If the lamp works but the grid does not appear to zap insects, the internal high-voltage circuit may have stopped working. A dirty grid can also affect operation, which is why the manufacturer’s cleaning procedure is a useful first step.
Some owner manuals list a damaged transformer or high-voltage circuit as a possible cause when the bulb illuminates but the grid does not zap. Their recommended response is to stop and contact customer service rather than attempt an internal repair.
A technician can inspect the circuit using suitable equipment and the correct service procedure. If the cost of repair is close to the price of a new unit, replacement may be the more practical option.
Cleaning does not help
The internal electrical circuit may have a fault.
Unusual electrical noise
Repeated sparking or continuous arcing can indicate contamination or a damaged grid. Turn off and disconnect the unit.
Professional diagnosis
A qualified technician can determine whether the electrical circuit can be safely repaired.
How to Test a Solar or Rechargeable Bug Zapper
Solar and rechargeable bug zappers need additional power checks because they do not always rely on a direct household outlet. A unit may appear broken when its battery is simply empty or its solar panel has not received enough sunlight.
Start by checking the charging indicator, battery condition, power switch, and charging connection. Use only the charger or charging method approved for the exact model.
For a solar model, inspect the panel for dust, leaves, shade, cracks, and other obstructions. A clean panel in a suitable location can receive more sunlight than one placed under a tree or beside a tall wall.
After charging, observe the device during its normal operating period. Do not open a sealed battery compartment or test battery terminals unless the manufacturer specifically permits that work.
Source: files.aptuitivcdn.com
Check the charging indicator
Look for the normal charging light or battery symbol described in the manual.
Inspect the solar panel
Look for dirt, shade, damage, and objects blocking direct sunlight.
Check the charging cable
Use the approved charging cable and adapter. Inspect them for visible damage.
Observe battery performance
If the unit runs only briefly after a full charge, the battery may be aging or the charging system may have a fault.
How to Check Whether a Solar Bug Zapper Is Charging
Place the solar panel where it can receive the sunlight recommended by the manufacturer. A panel that remains in deep shade may not charge the battery well enough for nighttime operation.
Look at the charging indicator if the model has one. Some units use a small light to show charging status, while others provide no clear visual signal. Check the manual rather than assuming that every model uses the same indicator.
Allow the recommended charging period before testing the operating time. Weather, seasonal sunlight, panel angle, and battery condition can all affect charging performance.
If the panel receives suitable sunlight but the battery does not hold a charge, contact the manufacturer. The panel, charging controller, wiring, or battery may need service.
Charging normally
The unit shows its documented charging indication and operates for the expected period after charging.
Possible charging problem
The charging indicator never appears or the unit stops shortly after a full charging period.
Possible battery problem
The unit charges but cannot maintain normal operation.
How to Test a Rechargeable Bug Zapper
Connect the approved charger to a suitable power source. Check whether the charging indicator responds and allow the battery to charge for the period specified in the manual.
Disconnect the charger before normal operation if the manufacturer requires it. Turn on the unit and observe whether the lamp or other operating indicator works.
If the unit fails to charge, check the cable and adapter for visible damage. Do not substitute a random charger because differences in voltage, current, and connector design can damage the battery or device.
Normal result
The device charges, switches on, and runs for a period consistent with the manufacturer’s specifications.
Poor result
The unit will not charge, becomes unusually hot, or stops working soon after charging.
Common Bug Zapper Test Results and What They Mean
The symptoms you observe can help narrow down the likely fault. The table below separates common signs from possible causes and sensible next steps.
These are troubleshooting clues, not a guaranteed diagnosis. Different brands use different circuits and lamps, so always check the owner’s manual before replacing parts or requesting repairs.
Source: ourpcb.com
Lamp is off and the unit is silent
Check the outlet, GFCI, power switch, plug, and cord. If the power source works, contact the manufacturer.
Lamp works but insects are not zapped
Check for visible grid contamination and follow the approved cleaning instructions. A high-voltage circuit fault may require service.
Lamp is dim
Check the lamp’s age and replacement schedule. Aged lamps may lose attraction effectiveness.
The device makes continuous sparks
Possible causes include debris, damaged grid wires, or an internal fault. Turn it off, unplug it, and seek manufacturer guidance.
The unit works but catches few insects
Review its location, competing lights, target insect species, and operating schedule.
The GFCI trips
Disconnect the unit. Moisture or an electrical fault may be present.
Bug Zapper Troubleshooting Table
Use this table as a quick reference when deciding what to check next. It focuses on observations that do not require opening the high-voltage compartment.
No power
Likely causes: outlet failure, tripped breaker, GFCI, damaged cord, or faulty internal power supply. First action: test the outlet with another suitable appliance.
UV lamp does not glow
Likely causes: lamp failure, poor seating, starter fault, or power issue. First action: check the outlet and follow the approved lamp inspection procedure.
UV lamp glows but no zapping is observed
Likely causes: grid contamination or high-voltage circuit failure. First action: visually inspect and clean only as permitted by the manual.
Frequent or continuous arcing
Likely causes: insect debris, distorted wires, or electrical damage. First action: disconnect power and request service.
Few insects are caught
Likely causes: placement, competing light, target species, or an aging lamp. First action: review the operating location and maintenance schedule.
Short battery runtime
Likely causes: insufficient charging, battery wear, or a charging-system fault. First action: follow the correct charging procedure.
When Should You Stop Testing?
Stop immediately if you notice a burning smell, melted plastic, smoke, exposed wires, a damaged plug, or unusual heat. These symptoms may indicate a fire or electrical hazard.
Repeated breaker or GFCI trips are another reason to stop. Do not bypass the protection or continue plugging in the device to see whether it works.
A cracked housing, missing protective screen, or broken inner grid also makes the device unsuitable for normal operation. Contact the manufacturer or replace the unit if it cannot be safely repaired.
Burning smell or smoke
Disconnect power if you can do so safely and keep away from the appliance.
Damaged electrical cord
Do not use the zapper until the cord has been replaced through an approved repair process.
Repeated electrical trips
Have the appliance and electrical supply checked by qualified personnel.
Broken protective screen
Keep the unit unplugged until the safety barrier is properly restored.
How to Know Whether a Working Bug Zapper Is Effective
A bug zapper can pass basic operating checks and still catch very few insects. That does not always mean that the device is broken. It may be attracting the wrong species, sitting in the wrong location, or competing with other light sources.
For example, a bright porch light can draw insects away from the zapper. A unit placed right beside a seating area may also be less useful than one positioned at a suitable distance from people, according to its manufacturer’s placement instructions.
Target species matter as well. Many electric light traps attract moths and some other flying insects, but they should not be treated as a complete solution for mosquitoes. Some mosquitoes respond more strongly to carbon dioxide, body odors, heat, and other cues than to light alone.
A practical performance check involves observing the unit over several evenings under similar conditions. Record whether the lamp works, whether normal zapping sounds occur, and whether the collection tray contains insects. A single quiet evening is not enough to prove that the device has failed.
Source: files.aptuitivcdn.com
Choose a suitable location
Follow the manual’s guidance for distance, height, indoor or outdoor use, and protection from competing light.
Avoid competing light sources
Strong porch lights and other bright sources may reduce the attraction effect of the zapper.
Check the target species
Confirm that the device is designed for the insects you want to control.
Observe performance over time
Compare normal operation and insect collection across several suitable evenings rather than relying on one short test.
Does a Bug Zapper Attract Every Type of Insect?
No. Different insects respond to different environmental signals. UV light can attract certain moths, flies, beetles, and other flying insects, but it does not have the same effect on every species.
Mosquito control is a good example. Some mosquitoes may approach light traps, but many use carbon dioxide, body odor, and heat to locate people. A conventional electric bug zapper may therefore catch insects without making a major difference to mosquito bites.
If mosquitoes are your main concern, use an approach suited to the species and the area. Remove standing water, use window screens, and follow relevant public-health guidance for personal protection.
Moths
Many species respond to light and may be attracted to suitable UV lamps.
Flies
Some flying flies may approach a light trap, but performance depends on the species and trap design.
Mosquitoes
Light alone may not attract enough mosquitoes to provide reliable bite protection.
How Long Should You Observe a Bug Zapper?
There is no single observation period that works for every model or insect population. Some units operate continuously, while others are designed for use during specific hours.
Follow the manufacturer’s operating instructions and observe the unit during the periods when the target insects are active. For many outdoor flying insects, activity can increase around dusk and after dark.
If the lamp operates normally but the tray remains empty over several suitable evenings, reconsider the target species and placement before assuming that the electrical grid has failed.
Check the manual
Use the recommended operating schedule for the exact model.
Compare similar conditions
Observe the device at similar times and in similar weather when judging its performance.
Look beyond the tray
Normal operation, insect behavior, and the surrounding environment all affect the result.
How to Maintain a Bug Zapper After Testing
Regular maintenance can help a bug zapper operate as intended and make future problems easier to identify. The most useful tasks are keeping the collection tray clean, removing approved debris, checking the power cord, and replacing the lamp when required.
Always disconnect the appliance before maintenance. Follow the manufacturer’s waiting and discharge instructions because unplugging the device does not necessarily remove every stored electrical charge.
Use a dry cleaning method unless the manufacturer specifically permits another method. Never spray the inner grid with a garden hose or household cleaner. Moisture and cleaning chemicals can damage electrical parts.
Check the unit before storing it for the winter. Remove dead insects, allow approved parts to dry, and store the appliance in a clean location as directed by the manual.
Source: i.ytimg.com
Clean the collection tray
Remove accumulated insects before debris becomes difficult to manage.
Keep the outer housing clean
Use an approved dry cloth to remove dust and dirt.
Inspect the power cord
Look for wear, cuts, loose connections, or other signs of damage.
Follow the lamp schedule
Replace aging lamps with compatible parts when required.
Store the unit correctly
Clean and store it according to the manufacturer’s seasonal storage instructions.
How Often Should You Clean a Bug Zapper?
Cleaning frequency depends on insect activity, weather, and the design of the device. A zapper in an area with many flying insects may collect debris much faster than one used in a screened porch.
Check the collection tray regularly during periods of heavy use. Follow the manual for grid cleaning and any recommended maintenance intervals. Some manufacturers recommend frequent checks because accumulated insects can contribute to a fire risk.
Do not wait until the unit stops working before checking it. A quick visual inspection can help you spot debris, a loose cover, or visible damage before the next use.
Heavy insect activity
Inspect the collection tray more often and clean it as needed.
Light seasonal use
Follow the manufacturer’s regular inspection schedule.
Before storage
Clean approved parts and prepare the device for storage as directed.
When Should You Replace a Bug Zapper?
A bug zapper may need replacement when its housing, protective screen, electrical cord, or internal circuit is badly damaged. If an authorized repair is unavailable or costs nearly as much as a new unit, replacement may be more practical.
Do not replace an entire zapper just because its lamp stops working. If the manufacturer provides an approved replacement lamp, changing that part may restore the attraction function.
However, a damaged high-voltage circuit or unsafe housing should not be treated as a simple bulb problem. Choose an approved repair or a new device rather than continuing to operate a questionable unit.
Consider repair
The fault involves a replaceable part and the manufacturer supports an approved repair.
Consider replacement
The unit has serious electrical damage, missing safety barriers, or an uneconomical repair.
Avoid temporary fixes
Do not bypass safety switches, modify the grid, or cover damaged wiring with tape.
Common Mistakes to Avoid When Testing a Bug Zapper
A simple test can become dangerous when someone tries to reach the internal electrical parts. The safest troubleshooting method is to observe the device and use only maintenance steps approved by the manufacturer.
Another common mistake is assuming that a glowing lamp means the whole unit works. The lamp and high-voltage grid have different jobs, so one can work while the other has a fault.
It is also easy to mistake poor insect control for electrical failure. A bug zapper may operate normally but attract few of the species in your yard. Check placement and target insects before deciding that the device needs repair.
Source: raypcb.com
Mistake 1: Touching the grid
The grid may carry dangerous high voltage. Never touch it or place any object across its wires.
Mistake 2: Testing with a metal tool
Creating a spark is unnecessary and can expose you to electrical hazards.
Mistake 3: Ignoring the owner’s manual
Different models have different bulb fittings, maintenance procedures, and safety requirements.
Mistake 4: Cleaning while connected
Always disconnect power before cleaning or performing approved maintenance.
Mistake 5: Using water on the grid
Water can damage electrical components and create a shock hazard.
Mistake 6: Buying the wrong replacement lamp
Match the model, lamp type, wattage, voltage, and fitting.
Mistake 7: Assuming every insect should be attracted
Different species respond to different cues, so a working zapper may not control every pest.
Mistake 8: Repeatedly resetting a tripping outlet
A recurring trip can signal a real electrical fault. Disconnect the unit and investigate the cause.
Is It Safe to Test a Bug Zapper at Home?
Basic external checks are generally suitable for a homeowner who follows the product instructions. These include inspecting the cord, checking the outlet with another appliance, looking for visible damage, and observing normal operation from a safe distance.
Internal electrical testing is different. A bug zapper can produce high voltage and may contain parts that store energy. Opening the electrical compartment, testing the transformer, or measuring the grid should be left to someone with the correct training and equipment.
If you are unsure whether a maintenance task is permitted, do not guess. Contact the manufacturer and ask for the correct procedure for your model.
Suitable basic checks
Exterior inspection, outlet testing, visible lamp observation, and approved cleaning.
Professional work
High-voltage measurements, circuit repair, transformer replacement, and internal electrical diagnosis.
A Practical Bug Zapper Testing Checklist
Use this checklist before deciding whether your bug zapper needs repair. It follows a simple order: check safety first, confirm the power source, inspect the accessible parts, and then observe normal operation.
A failed safety check means you should stop rather than continue. A device with damaged wiring, a broken protective screen, or signs of burning should not be connected to power.
Source: files.aptuitivcdn.com
Safety
The device is switched off and unplugged before inspection or maintenance.
Exterior
The cord, plug, housing, switch, and protective screen show no visible damage.
Grid
There is no visible break, deformation, or excessive debris.
Collection tray
The tray is clean and correctly installed.
Lamp
The lamp is intact and appears to operate normally.
Power source
The outlet works and the electrical connection is suitable for the device.
Assembly
All covers, access panels, and safety barriers are securely fitted.
Normal operation
The device shows no burning smell, excessive heat, repeated tripping, or other abnormal behavior.
Performance
The unit is placed according to its instructions and is suitable for the target insects.
What Is a Successful Test Result?
A successful basic test means the bug zapper passes the visible safety checks, receives power, and operates normally according to its design. Its lamp should function as specified, and the device should not show signs of electrical damage or overheating.
However, this is not a guarantee that every internal electrical component is working at its rated performance. A normal-looking lamp cannot confirm the exact output of the high-voltage grid.
If you need confirmation of the grid’s electrical performance, use the manufacturer’s approved service process. Do not attempt to create a spark or measure the grid with ordinary household tools.
Basic pass
The outlet, exterior, lamp, covers, and normal operating behavior all appear correct.
Further inspection needed
The lamp works, but normal zapping activity is absent or the insect-control performance has changed.
Fail
The unit has damaged electrical parts, repeated electrical trips, a burning smell, or another serious safety issue.
Frequently Asked Questions
Q
How do I know if my bug zapper is working?
Check whether the device receives power, its lamp operates, and its housing and protective grid appear intact. During normal operation, you may hear short zapping sounds when insects contact the energized grid. However, a glowing lamp alone does not prove that the grid works.
If you suspect that the grid is inactive, disconnect the device and follow the manufacturer’s troubleshooting instructions. Never touch the grid or use a screwdriver to create a spark.
Q
Can I test a bug zapper with a screwdriver?
No. You should not use a screwdriver or another object to bridge the electric grid. This method deliberately creates a high-voltage discharge and can cause electric shock, burns, or equipment damage.
A safer approach is to inspect the unit while unplugged, check the power outlet, and observe normal operation from a safe distance. Ask the manufacturer or a qualified technician to test the internal electrical circuit.
Q
Why does my bug zapper light up but not zap insects?
The UV lamp and the high-voltage grid perform separate functions. The lamp may work while the grid has a problem. Possible causes include insect debris, a damaged grid, a failed transformer, or another internal electrical fault.
Disconnect the device and clean it only as the owner’s manual allows. If the problem continues, contact the manufacturer for authorized service.
Q
How can I tell if my bug zapper bulb is bad?
A bulb that does not illuminate may have failed, become loose in its socket, or lost its power connection. Check the outlet first, then follow the manufacturer’s instructions for inspecting an accessible bulb.
A lamp can also become less effective at attracting insects while still producing visible light. Compare its operating hours with the replacement schedule in the owner’s manual.
Q
Can a bug zapper still hold electricity after being unplugged?
Yes. Some bug zappers contain electrical components that can retain a charge after the power is disconnected. The amount of stored energy and the time required for safe servicing vary by model.
Do not assume that unplugging the unit immediately makes its inner grid safe to touch. Follow the exact manufacturer’s discharge and waiting instructions.
Q
Why does my bug zapper keep making sparks?
Occasional short zapping sounds may be normal when insects reach an energized grid. However, frequent or continuous sparking can indicate insect debris, bent grid wires, an incorrect gap, or an electrical fault.
Turn off and unplug the device. Do not bend the grid or attempt to repair the high-voltage circuit yourself. Clean only as directed and contact the manufacturer if the problem continues.
Q
How often should I test my bug zapper?
Inspect your bug zapper before the insect season begins and check it regularly during periods of heavy use. Look for damaged cords, loose covers, insect buildup, and signs that the lamp needs replacement.
You should also inspect the unit after severe weather or before putting it into seasonal storage. Follow the manufacturer’s maintenance schedule for more specific guidance.
Q
Can I use a multimeter to test a bug zapper?
A standard multimeter should not be used to measure the high-voltage grid unless the exact equipment and procedure are rated and approved for that purpose. Ordinary meters and probes may not withstand the electrical conditions inside the unit.
You can check a suitable household outlet using an approved method, but internal high-voltage measurements should be performed by a qualified technician.
Q
Why does my solar bug zapper stop working at night?
The battery may not have received enough charge during the day. Shade, dirty solar panels, cloudy weather, battery wear, or a charging-system fault can reduce nighttime operation.
Clean the panel according to the manual, place it where it receives suitable sunlight, and allow the recommended charging time. If the battery still fails to hold a charge, contact the manufacturer.
Q
Does a working bug zapper kill mosquitoes?
Some mosquitoes may approach electric light traps, but a conventional bug zapper does not reliably attract every mosquito species. Many mosquitoes use carbon dioxide, body odor, and heat to locate people.
If mosquitoes are your main concern, remove standing water, use intact window screens, and follow public-health guidance for bite prevention. Do not rely on a bug zapper as your only mosquito-control method.
✦ Wrapping Up
Conclusion
Learning how to test a bug zapper starts with a few simple checks. Inspect the exterior, examine the cord and plug, check the outlet, look at the UV lamp, and remove insect debris only through the manufacturer’s approved cleaning process. Then observe the fully assembled device during normal operation.
Remember that a working lamp does not prove that the high-voltage grid is working. If the zapper lights up but does not produce normal zapping activity, the grid or internal electrical circuit may need professional attention. Avoid screwdriver spark tests, homemade electrical testers, and direct contact with the grid.
A bug zapper can also work correctly and still catch few insects. Target species, outdoor lighting, location, lamp age, and local insect activity all affect its performance. Check these factors before deciding that the unit needs replacement.
The safest rule is simple: inspect what you can see, test the power source safely, follow the owner’s manual, and leave high-voltage repairs to qualified professionals. A careful test can help you find the problem without turning a small maintenance task into an electrical hazard.
💡 Key Takeaway
Before your next use, unplug your bug zapper and inspect its cord, housing, protective screen, lamp, and collection tray. Check the outlet with a known-working device, clean only as the manual permits, and observe normal operation from a safe distance. If the grid appears inactive, the GFCI repeatedly trips, or you notice burning smells or electrical damage, stop using the unit and contact the manufacturer or a qualified technician.
If you’ve got Terro Liquid Ant Killer running on your kitchen counter and a curious cat keeps sniffing at the little plastic station, you’ve probably typed “is…
Does fire ant killer work on regular ants? Learn when it works, which ants it can kill, how bait differs from contact insecticides, and how to choose safely.